Most of us have had some experience of attempting some form of DIY, anything from hanging a picture to assembling furniture. It can be tricky, baffling, fiddly or downright frightening at times to consider delving into your toolbox and starting a project. Well, it doesn’t have to be! In this post, we’ll take a look at how you can find that untapped DIY potential and install your own blinds, with your own fair hands.
We’ve had our own fair share of DIY misadventures and learning experiences, so here we’ll do our best to guide you through just how simple the process can actually be.
So square those shoulders, grab those tools and prepare to become a champion blinds installer!
Table of Contents
Toggle- 1. Deciding Where to Install – Recess or Exact?
- 2. Measuring
- 2.1. Use a metal tape measure
- 2.2. Pay attention to any obstructions in the area you’re measuring and factor them in accordingly
- 2.3. The best place to measure for a roller blind is at the exact location you want to install the brackets
- 2.4. Measuring to fit more than one blind on the window is easier than it seems
- 3. Installation
- 4. And Relax…
1. Deciding Where to Install – Recess or Exact?
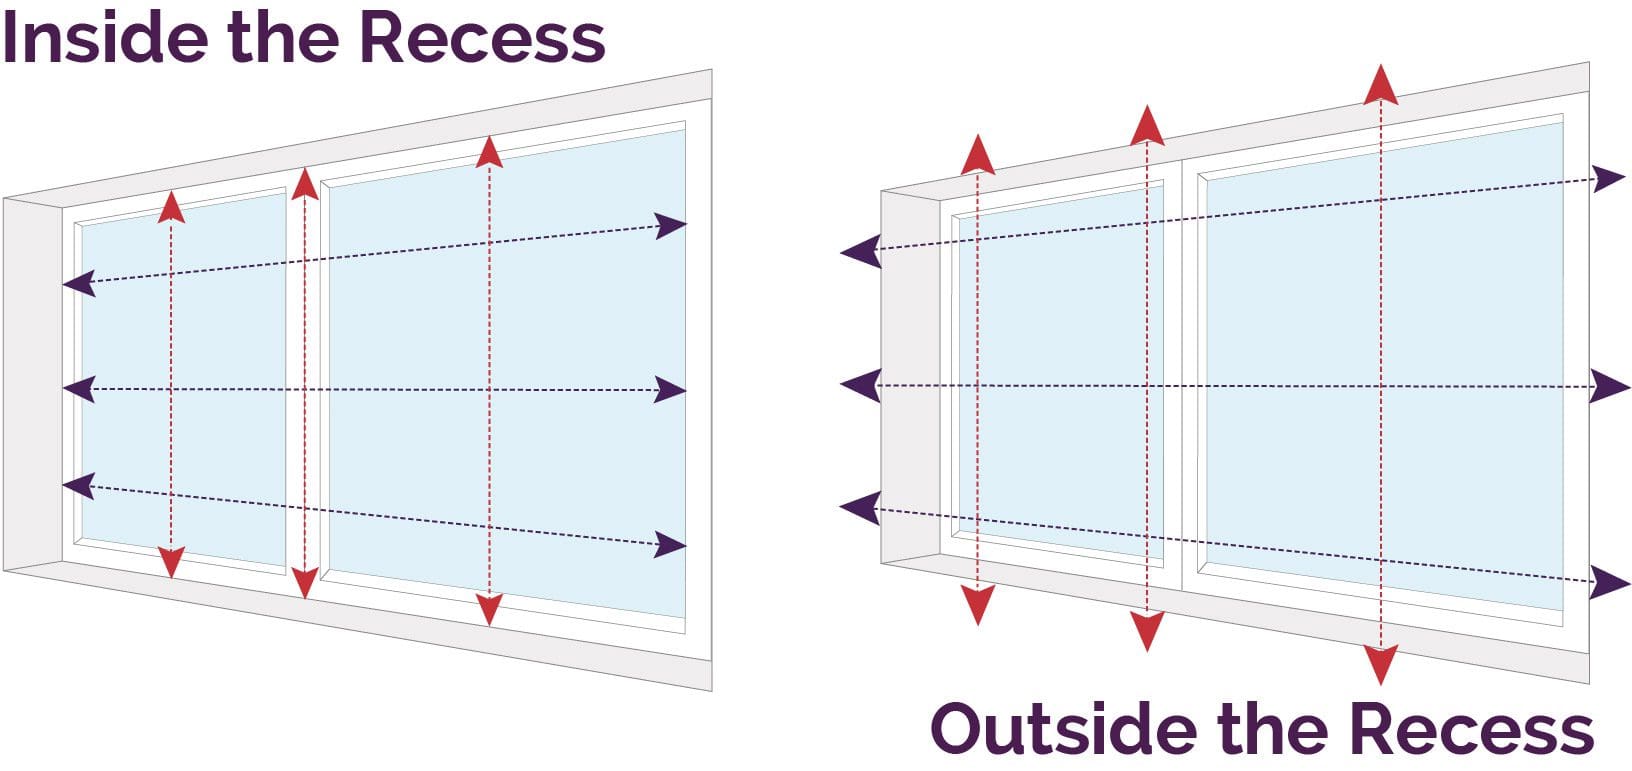
The first thing you’ll need to think about (after choosing what blind you think would look best) is precisely where you’re going to fit it. This is usually pretty straightforward – most of the time you’re only thinking about whether to fit inside the recess or outside – but sometimes there are things that can get in the way or otherwise affect where you might be able to fit brackets.
Inside the recess (‘recess’ fitting) is recommended for most blinds most of the time, and most customers agree that a blind installed inside the recess is more aesthetically pleasing. In some cases though there are problems fitting something inside that space – a lack of space or other fittings in the way – and some people just prefer the look of something fitted outside the recess (‘exact’ fitting). Here are a few things that might help you to decide which to go for if you’re unsure.
1.1. Can You Fit the Brackets Inside the Recess?
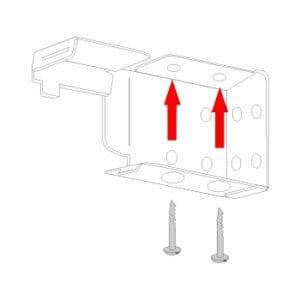
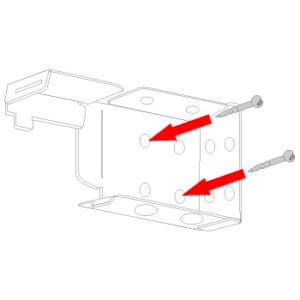
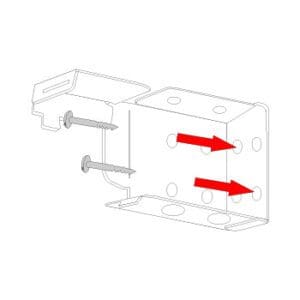
Most of our blinds use brackets that need to be screwed onto a flat surface, and most are universal enough to be able to choose how you attach them. There are limitations on where brackets can be attached though, and this needs to be considered before choosing where you’ll fit the blind.
Most of the blinds will come with brackets that can either be top-fixed or face-fixed, and a few can be side-fixed as well.
A note on top-fixing – some lintels are made of particularly dense concrete or steel, which can be VERY difficult to drill holes into. We’ll look at how you can do so later on in the post, but for the most part we’d recommend against it unless you really have to.
Equally, for face-fixing, we wouldn’t recommend it if the windows are still under warranty, because that could be invalidated by attaching anything directly to them.
If you genuinely can’t do any of the above, then it would be best to fit outside the recess.
1.2. Is the Recess Deep Enough?
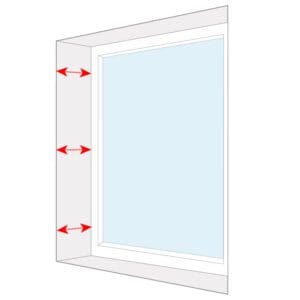
By ‘depth’ we’re referring to the distance to the back of the recess, of course. How far the blind ‘sticks out’ from back to front will dictate whether you can fit that blind inside the recess or not, we usually call this the headrail depth. If you think your recess isn’t particularly deep, then check out the below table of headrail depths for all our blinds to see if you have enough space.

Again, if you don’t, you’ll probably have to consider fitting outside the recess instead.
1.3. Vents & Handles
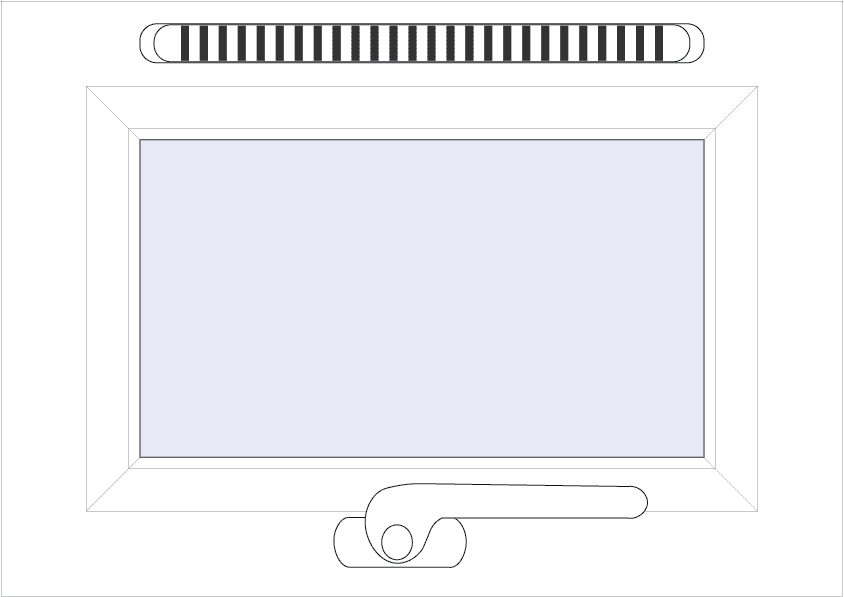
It’s best to check for any obstructions in the window as well that can affect how much depth you have available in the recess. The most common tend to be things like trickle vents and window handles.
The easiest way to check is to take 2 measurements – one from the window frame to the front of the recess, then one from the window frame to the front of the obstruction. Take the latter away from the former to see how much depth you have, and again refer to the above list of headrail depths to see if the blind has enough space to fit in. If it doesn’t, you’ll have to go for an exact fitting.
1.4. Sash Windows
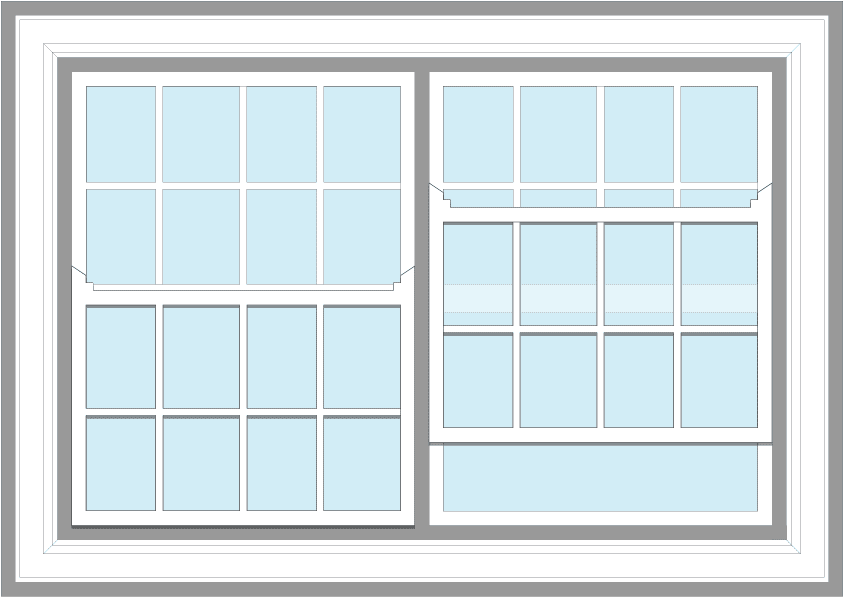
Sash windows are still a common sight in many homes, and as beautifully decorative and bright as they are, they can cause a bit of confusion when it comes to fitting window dressings.
The inside of the recess usually isn’t an option for sash windows, partly because all the decorative framing makes sizeable flat surfaces pretty rare, but also because of a lack of depth. The main feature of a sash window is that the lower half of the window opens vertically, sliding over the top half of the window. Because of this, any free space (depth) at the top of the window is immediately filled as the window is opened, meaning there’s only space to fit anything there if the window is never opened.
For the most part, the best thing to do is going to be to take a look at the decorative outer frame around the outside of the window recess. Between all the fancy shaping and bevelling there will usually be a sizeable flat area of the frame, and you can attach brackets directly onto this to fit your blind.

If you choose to fit like this, then despite the fact that the blinds won’t be inside the recess, we’d still recommend choosing recess fitting when you order.
1.5. Inward Openers & Doorways
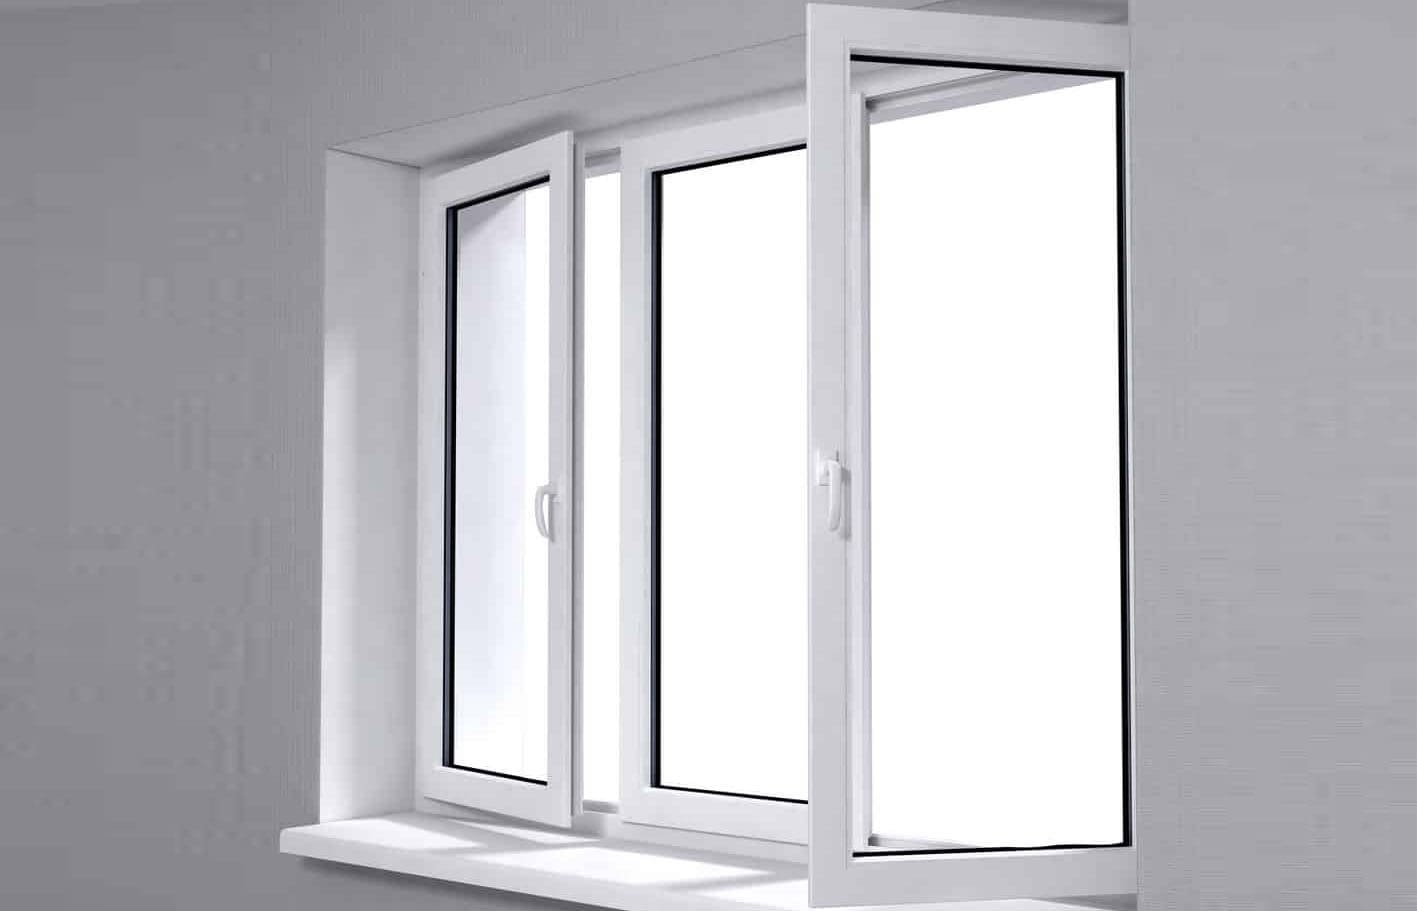
If your window opens inwards, then you’re most likely going to have to fit your blinds outside the recess. Generally speaking there simply isn’t enough vertical space above the opening window to fit the components of a blind, no matter how slimline the design.
One consideration might be to change tack altogether and choose a different style of blind to what you might have been considering if you really don’t want to mount the blind outside the recess. Many of our drill-free blinds are ideal for the purpose and in particular, our EasiFIT and PerfectFIT blinds are specifically designed for uPVC windows with a rubber bead (which describes most modern, double-glazed windows).

These tend to work just as well for PVC doors too, allowing you to fit a blind directly into the glass panel of the door without making any holes. More conventional blind types can be fitted directly to the door if you so wish, but remember to consider whether there’s any space between the door and the wall of the recess when the door’s open:
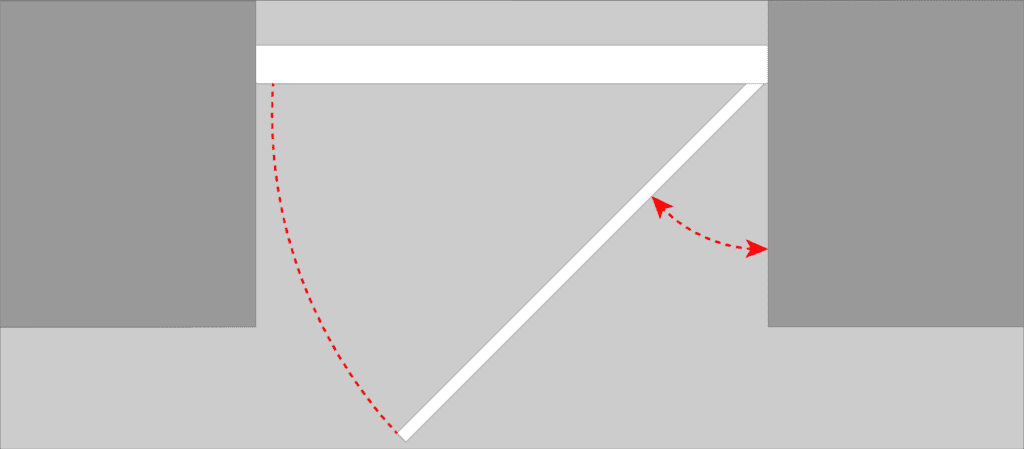
If you choose to fit something onto the face of the door then try to aim for products that stand out the least from the surface – pleated blinds and aluminium Venetian blinds are particularly good for this reason.
1.6. BiFold Doors
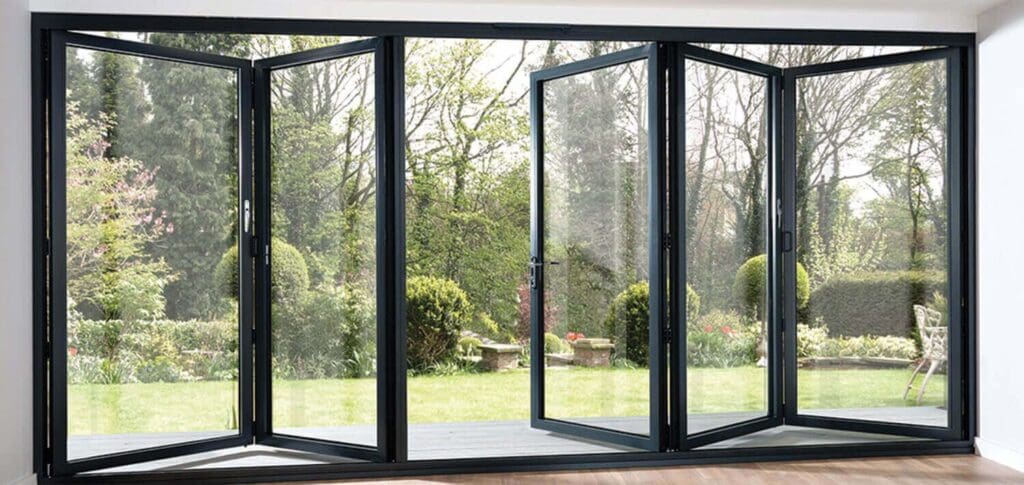
BiFold doors are truly beautiful and offer stunning panoramic views and endless brightness – but they can be a real pain to find good blinds for! There really aren’t too many practical options here, but you can find some; vertical blinds or privacy sheers inside the door recess, or curtains outside the recess are by far the most practical if you want to cover the whole space in one go, but we’d recommend our ClickFit Blinds. Just like our conservatory range, these blinds are designed for fitting without screws and will move with the door panels as they open, so those are the easiest choice.
2. Measuring

We won’t delve too far into measuring here, because we have an excellent measuring guide on the site already (click the pic above to take a look!). It’s a broad guide though, so below are a few general pointers we think you ought to be aware of when taking your measurements.
Before that though, a few things you’ll need and/or find useful to have with you when measuring:
- A tape measure (I suppose that goes without saying…)
- A pen or pencil for marking out where you’ve measured
- Masking tape; You can stick strips of this over where you’re making your pencil marks, to avoid making marks on window frames or walls
- A spirit level; non-essential, but useful. Use it to check that the area you’re planning to fit blinds to is level. NOTE: If you’re measuring for shutters, then a spirit level really IS essential!
Moving on, here are some useful things to know or to bear in mind when taking your measurements:
2.1. Use a metal tape measure
Fabric and plastic tape measures don’t really cut the mustard; On the one hand they don’t often extend out to as high a measurement as metal ones, but moreover they have a tendency to stretch and warp, which could make your measurement inaccurate – to the extent that your blinds won’t fit as intended, if at all.
2.2. Pay attention to any obstructions in the area you’re measuring and factor them in accordingly
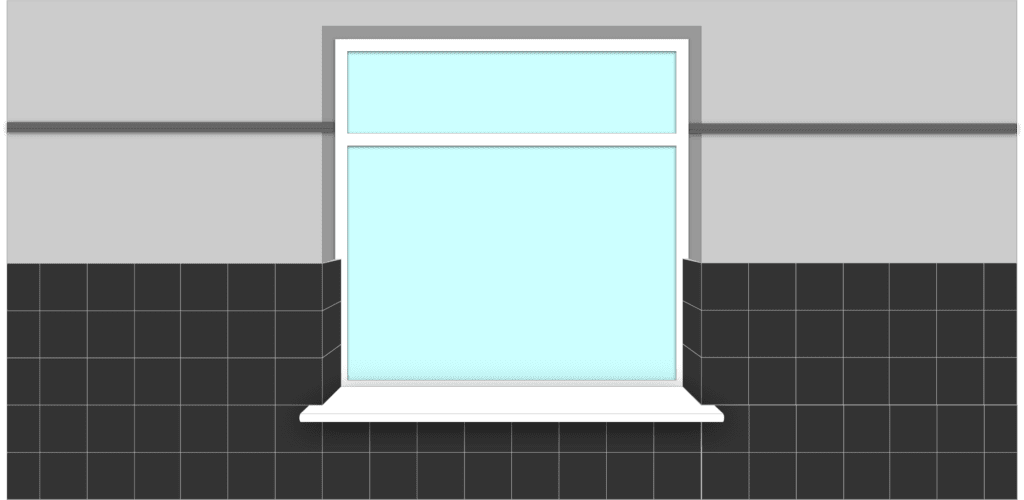
This is particularly important if you’re measuring your recess; elements like skirting boards, picture rails, tiles etc., can narrow your recess considerably at the point they’re placed. For the width in particular, make sure you’re measuring inside these areas and not ignoring them. In the above example you can see both tiles at the bottom of the window and a picture rail toward the top – you’d measure the width between each of these areas and use the narrowest to order.
If you’re ordering wooden blinds, we’d recommend you give us a call to order for a space like this. The pelmet of a wooden blind is cut separately to the blind itself, so you could ask us for the pelmet to match the width at the top of the recess while the blind matches the narrowest point, that way there won’t be a gap either side of the pelmet up at the top of the window.
If you’re ordering shutters, then it’s bad news – fitting a shutter into a space that isn’t flat and even all the way around would mean either doing some serious filling of gaps, or removing any obstacles in the recess altogether (which would mean re-plastering and redecorating the recess when you’re done, lots of work).
Rollers are also a little different in a space like this – our measuring guide says:
Top Tip: Measuring for your roller blind is slightly different because the overall width of the blind including the brackets is approx. 3.5cm wider than the fabric. With this in mind you can choose to measure from where the brackets will sit (‘bracket to bracket’) or the area the fabric will cover (‘fabric width’).
That means that if the difference between the very top of the recess (where the brackets will be placed, the widest part of the blind) and the narrowest point is less than around 3cm, you should still be able to use the width at the very top of the recess to order. Which reminds me…
2.3. The best place to measure for a roller blind is at the exact location you want to install the brackets
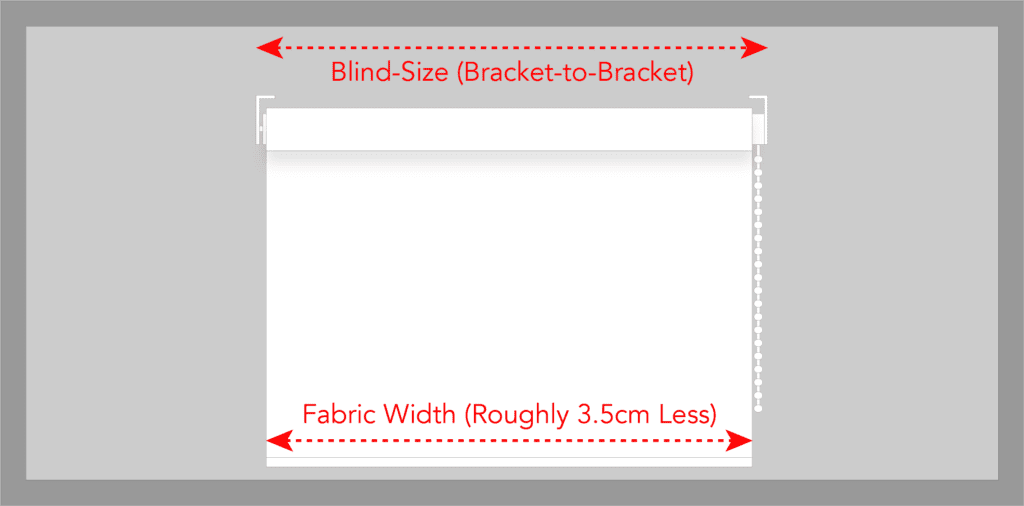
Most of the time, the top part of the recess is not going to be a great deal wider than the bottom (there’s always some small variance in every recess). This is important to bear in mind with roller blinds, because you want it to fit nice and tight where the brackets are installed to ensure the best fit and minimal gaps down the sides where the fabric is narrower. And because you’ll almost always be fitting the brackets up at the very top of the recess, this is the best width measurement to use to order the blind, as long as you’ve checked for obstructions in the recess, as per section 2.2 above.
2.4. Measuring to fit more than one blind on the window is easier than it seems
If your window is just too wide to have your perfect blind (we can make ’em big, but there are limits to the sizes we can do, which vary across blind types) then you might consider ordering more than one, to fit beside each other. Usually if the window is that large, it’ll be split into multiple panes.
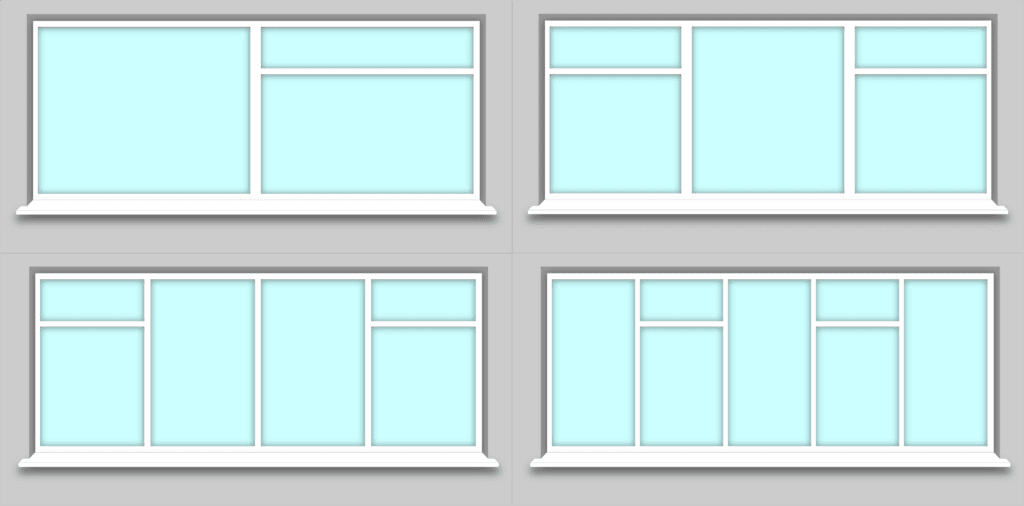
The best rule to follow here is not necessarily to match the number of blinds to the number of windows – it’s to match even with even and odd with odd. Try to minimise the number of blinds you’re fitting into the space so that you don’t get overrun with cords and controls – so whether there are two, four or six panes in the window, try to get two blinds to fit. If there are three, five or seven, go for 3 blinds. This is because there will always be a small gap between the blinds when fitted, and really you want the window frame to be behind that gap, not glass.
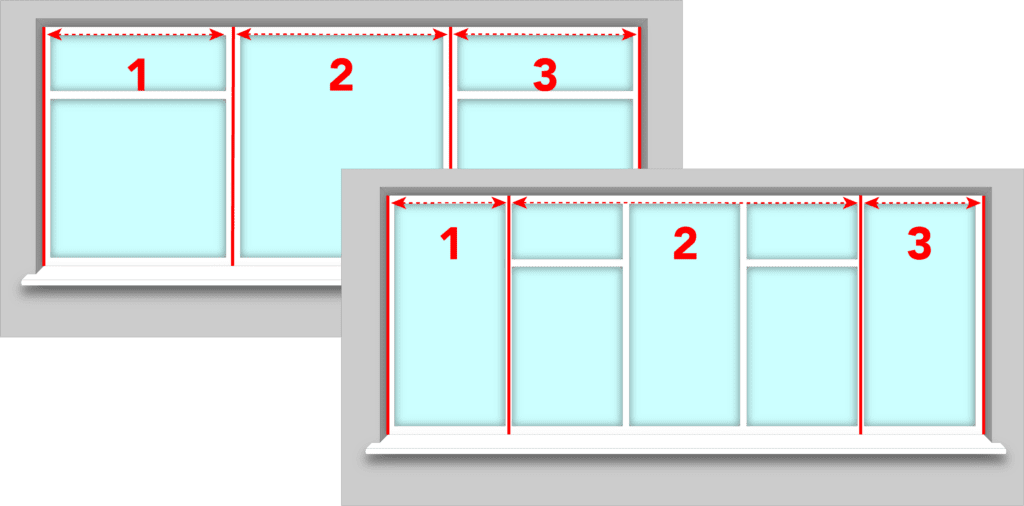
Measuring is pretty easy too. If there are an even number of panes in the window, check to see whether the central divide is exactly in the middle of the space. If it is (it usually is) then just measure the whole recess wall-to-wall, split that measurement in half, and order two blinds, both as recess fitting.
If there are an odd number of panes, or an even number that are different widths, then it’s only a little different. In that case measure for each width individually, starting at one wall of the recess. Measure over to the centre of the frame where you’d like the blinds to meet, make a pencil mark, then measure from there over to the centre of the next frame or to the wall. Top Tip: Stick a little masking tape to the frame where you want to make a mark, so you’re not getting marks on the window frame.
3. Installation

First, let’s not forget that there are individual fitting guides for each blinds on the website, tailored to that blind, that you can view instantly in .pdf format or download for later viewing.

So we won’t go into exhaustive detail here about how to install each type of blind. Rather, we’ll look at a few general tips and advice on using the tools you’ll need to install your new blinds, alongside some common pitfalls and problems. Before that though, here’s a list of the bits and pieces you’ll either need or at least find useful, for fitting. If you’ll be wanting to put your blinds up as soon as you get them, then check through this list and go grab anything you’re missing before the blinds arrive:
- A decent drill with a hammer setting. Probably the most affordable selection here will be plug-in versions rather than battery-operated ones, as they usually have the power you need without the hefty price tag. And the hammer setting is a bit of a deal-breaker – the rotary setting on a drill is best reserved for when you’re using screwdriver bits, and the hammer setting is there for when you’re drilling through tough masonry
- A cross-head (Phillips) screwdriver, or screwdriver bits for your drill
- Masking tape. Sticking a piece of masking tape over the area you’ll be drilling into will protect the paintwork when you’re marking out your screw holes, it’ll also help to prevent your drill bit from slipping when you start drilling
- A decent hammer
- A spirit level; making sure things are straight and level is so much easier with one of these
- Ideally a spare stock of screws and rawl plugs, suitable for the surface you’ll be fitting brackets to; Most of the time we’ll send those with the blinds, but even when we do they’re only standard fittings and not necessarily the best option for where you’re fitting (more on this later on)
And wherever possible, certainly if you’re not too experienced with DIY:
- Help; there’s no shame in calling in a second pair of hands, as it will be one of the most useful things to have with you, for all manner of reasons! NOTE: If you’re installing shutters, then we very strongly recommend making it a two-person job, due to the weight and bulk of shutters
OK, so let’s work through some pointers and pitfalls:
3.1. Prep!
Everyone always says it, we all smile and nod and agree, then we crack on anyway. Genuinely, the way to staying stress free is making sure everything that needs to be out of the way is out of the way, and that you have everything you need, ready and waiting, before you start. There are few things more rage-inducing than getting half way through a DIY job and realising you’re missing something or you’ve gotten something wrong.
One of the main things to check in advance is whether you have the correct fittings for the surface you’ll be fitting the blind to. If you’re going to be attaching brackets to plasterboard, PVC, wood or anything else that isn’t plain-old brick and mortar, then we’d suggest popping to your local hardware store and checking with them which screws and other fittings would be best to use, as we don’t send a selection of different ones, and the ones you receive from us may not necessarily be the best for you.
Drill bits are the other thing to check – if you do go to get more screws then make sure you ask about the drill bits to use for them as well. The main point here though is to make sure that you’ve got at least a small range of different sizes, ranging from size 4 to size 8, to make sure you can drill a hole that’s the best fit for your fittings. NOTE: If you’ve a bit of cash to spare (no more than a few pounds) then it might also be worth picking up a selection of HSS (High Speed Steel) drill bits in different sizes too; these are essential if it turns out you have a steel lintel above the window, which is usually very difficult to determine before you start drilling. More on steel lintels later.
3.2. Check your blinds before you start installing
There are a few elements to our products that make them stand out from others, most notably the made-to-measure nature of them.
We aim for perfection with every single order, but every once in a while things go wrong, it’s unavoidable. Check the size of the blind as soon as you unpack it, and make sure it matches what you ordered; if you’ve accidentally mis-measured, or we’ve made a mistake in manufacturing, you don’t want to be discovering that half way through the installation – or worse, after you’ve already made holes for the brackets and fittings! If there’s any doubt over whether the blind is right for that space then get in touch and we’ll go through the details with you and help where we can.
3.3. Make sure you’re fitting in the same location as you measured
It may sound obvious, but especially for those who aren’t fitting the blind inside a recess, it’s absolutely essential that you make sure your installation matches where you measured. Trying to fit something higher or lower than where your measurement was taken, or off to the side, is likely to result in stressful and unnecessary correction work.
3.4. Use rawlplugs!
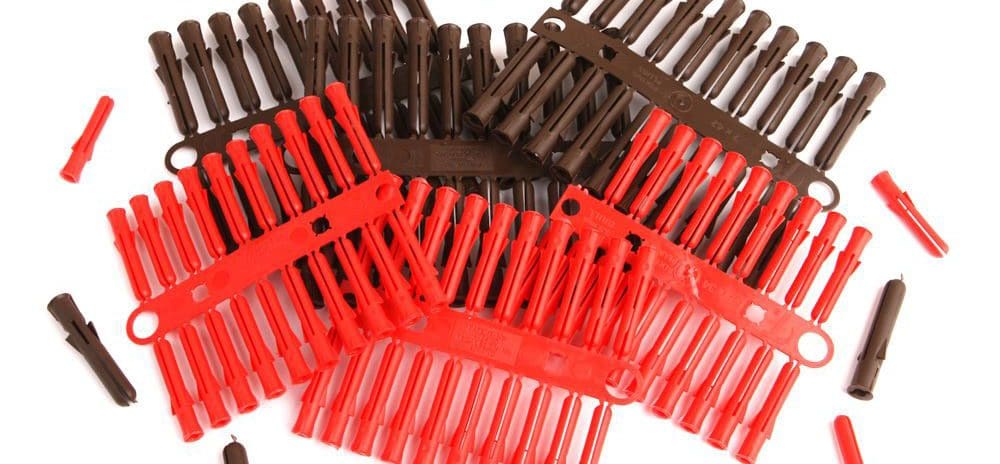
They come in all sorts of shapes and sizes, colours and designs, but in almost all cases they’re essential. Rawlplugs are designed to be anchors for the screw you’re putting in; make a hole, insert a rawlplug, then screw the screw into that – the screw will not only gouge into the plastic of the plug and bite into it securely, at the same time it will force the plug to expand, squeezing it tighter into the hole and ensuring a really tight, solid fitting. Installing into any plastered surface without these will almost definitely result in an unreliable and short-lasting installation, as the hard metal screw will quickly wear down the brick around it and become loose. A plug prevents that from happening.
A good tip is to make your hole using a drill bit that’s a smaller diameter than the plug – the tighter you can make the arrangement the better!
3.5. Plasterboard
Plasterboard is just soft, composite wood sheets, textured to allow plaster to adhere better to their surface. It’s fixed onto walls and ceilings to provide a better surface to plaster onto, usually only ending up an inch or so thick with the plaster applied, with a solid wall behind it.
Sometimes though plasterboard is applied to a frame of some sort with no solid surface behind it, often when creating partition walls inside the house or when creating a ceiling surface. If the wall sounds more hollow when you knock on it than when you knock on brick, then it’s probably plasterboard. We’d recommend against trying to fit brackets directly onto plasterboard, because it just doesn’t have as much strength as other surfaces.
If you’re forced to then make sure you have some rawlplugs that are designed for the job – ordinary ones run the risk of ripping a big hole in the plaster if too much weight is put on them. Pop to your local hardware store and ask for plugs that work best with plasterboard. Top Tip: Give us a call to place your order – distributing the weight of the blind as much as possible is the best way to ensure it doesn’t come crashing down in the middle of the night, so we can usually send you some extra brackets to fit up and spread the weight around more, by request.
3.6. OMG! RSJ!
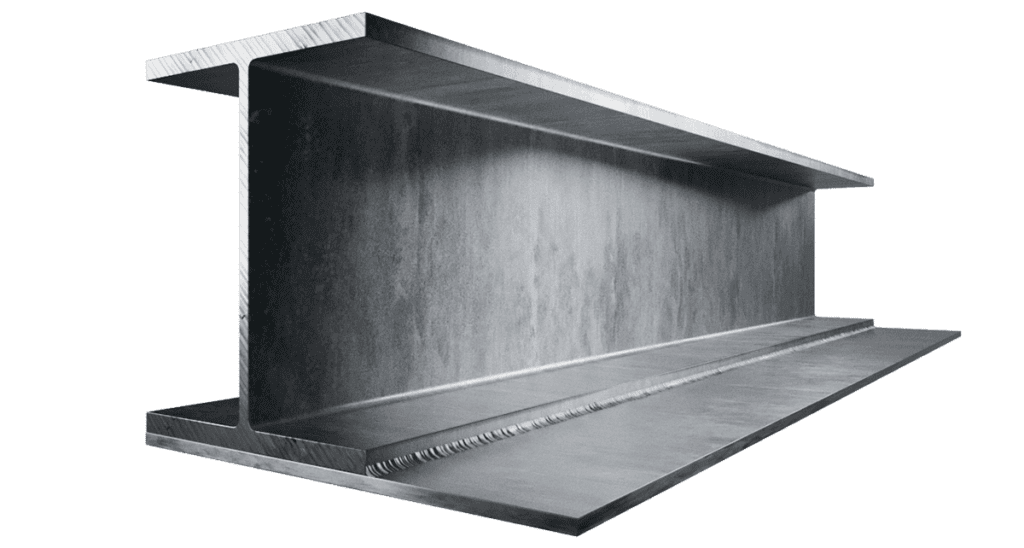
RSJ stands for ‘rolled steel joist’, or a steel lintel, and it’s the bane of blind-fitting. If you’re drilling up into the top of the recess and the drill bit sinks through the plaster an inch or so then suddenly won’t go any further, the likelihood is that you have an RSJ installed.
Two important things to note here – firstly don’t panic, you can still install. Secondly, you’re probably going to ache a bit afterwards.
On the first point, check around to see if it’s possible for you to fit the brackets differently but in the same general spot (so your measurements aren’t affected). If you’re fitting into a recess and you can side-fix or face-fix the brackets, do that. If you can’t, and you’ve no choice but to keep going, you can still go through it – it just won’t be easy, physically speaking.
First off, if you didn’t get any HSS drill bits, don’t bother trying to continue until you get some. High Speed Steel bits are coated with titanium to prevent them from wearing down almost instantly while trying to drill through solid steel, which is what will happen to other drill bits if you try.
Next, go get a cup of water (room temperature, not cold) and have that by you.
Attach a HSS bit to the drill, take a deep breath, and make a start on drilling. Let’s be frank – this is going to be a long, uncomfortable job. A fresh, new HSS bit is probably going to bite through the steel lintel quite easily on the first go, as its edges are still nice and sharp and it’s still cold. Don’t let that lull you into a false sense of security though; as that bit whizzes around, biting into the steel, the extreme friction will start to make it REALLY hot, which means it will soften.
Dip the drillbit into the water and hold it there for 10 seconds or so to cool down, then move onto your next screw-hole. This time you’ll probably meet a LOT more resistance, as the bit has been blunted a little and, despite being cooled in the water, has inevitably softened a little. This time, getting through is going to take a lot more time and a lot more energy, so much so that it’s tempting to give up after a while! Press on though, push against that drill as much as you can, making sure you dip the drill bit back in the water every ten or fifteen seconds to cool it, and you’ll eventually get through. Depending on how many holes you need to drill you may well be exhausted afterwards, but you’ll get there.
4. And Relax…

And that, as they say, is that. Once everything’s fitted and the tools are packed away it’s time to get the kettle on and enjoy your handiwork.
We hope all this has been of some use to you, and of course, feel free to share any of your own tips or DIY stories in the comments!
